Cloud — Media Uploads
In the cloud, media uploads work the same way as local — with one key difference: files are committed to GitHub and served by your hosting provider.
Pycora Pro stores all media in:
static/img/
When you upload through Decap CMS, the file is committed to your GitHub repo and appears at /img/filename.ext on your live site.
Before You Begin
Make sure:
- Cloud CMS is set up (see Cloud — CMS Access)
- You are logged into
https://your-site.com/admin/ - Your site is deployed and live
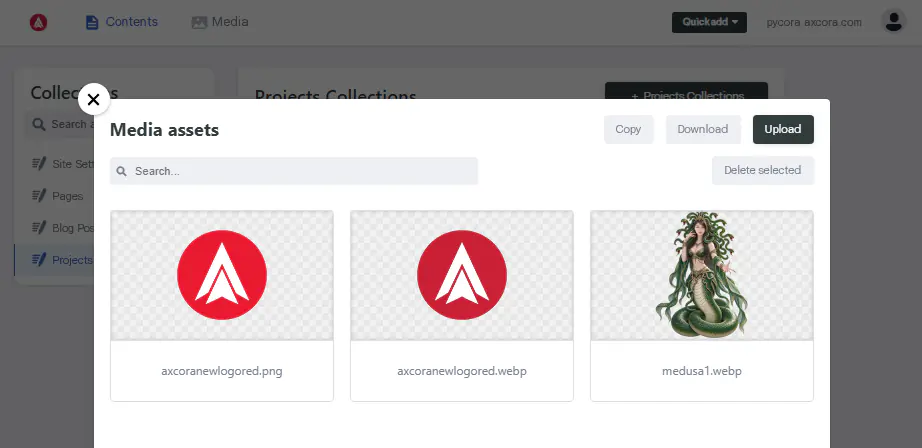
How Cloud Media Upload Works
Pycora Pro uses Decap CMS's image widget. When you upload:
- The file is committed to your GitHub repo under
static/img/ - Your host (Cloudflare/Netlify/Vercel) detects the commit
- The site rebuilds
- The image is live at
/img/filename.ext
The media folder is defined in static/admin/config.yml:
media_folder: "static/img"
public_folder: "/img"
media_folder— where files are saved in the repopublic_folder— the URL path used on the live site
Step 1 — Upload an Image
- Open any page in the CMS that has an image field (e.g., Pages → Home Page → Hero → Image)
- Click the image field
- Click Upload
- Select an image from your computer
- Wait for the upload
- Click Save
The image is committed to GitHub. After the rebuild, it appears on your live site.
Step 2 — Use an Existing Image
If the image is already in static/img/:
- Click the image field
- Click Choose an existing image
- Browse the media library
- Select the image
- Click Save
Step 3 — Verify the Upload
- Open your GitHub repository
- Navigate to
static/img/ - Confirm your file is there
- Open
https://your-site.comand check the image renders
If the image does not appear:
- Wait 30–90 seconds for the rebuild
- Refresh with
Ctrl + Shift + R - Check the host's build log for errors
Supported Formats
Pycora Pro works with any image format your browser supports. Recommended:
| Format | Best For | Notes |
|---|---|---|
| AVIF | Hero images, featured images | Smallest file size |
| WebP | General use | Wide browser support |
| JPG | Photos | Universal |
| PNG | Logos, icons with transparency | Larger files |
| SVG | Icons, logos | Scalable, tiny |
Tip: Convert large JPGs and PNGs to WebP or AVIF before uploading. This keeps your site fast and your Lighthouse score high.
Where to Use Images
Every image field in Pycora Pro maps to a specific section:
| Page | Field | Purpose |
|---|---|---|
| Home Page → Hero | hero.image.url | Hero image on the homepage |
| Home Page → Intro Grid 1 | intro_grid1.image | First grid image |
| Home Page → Intro Grid 3 | intro_grid3.image | Third grid image |
| Home Page → Testimonial | testimonial.image | Testimonial background |
| Home Page → Testimonial → Client | testimonial.client.image | Client photo |
| About Page | image | About page image |
| Contact Page | image | Contact page image |
| Blog Posts | image | Featured image per post |
| Projects | image | Featured image per project |
| Site Settings | image, favicon, logo | Global brand assets |
Image Naming Best Practices
Use clean, descriptive filenames:
| Good | Bad |
|---|---|
hero-homepage.avif | IMG_2024_final_v2.jpg |
client-alvio.avif | Untitled-1.png |
logo-dark.svg | logo (1).svg |
Rules:
- All lowercase
- Use hyphens, not spaces
- No special characters
- Keep it short
Replacing an Image
To replace an existing image:
- Open the image field
- Click Upload
- Select the new image
- Click Save
The new file is committed. The old file remains in static/img/ — you can delete it manually via GitHub if you want.
Deleting an Image
To delete an image:
- Open the media library (click any image field → Choose an existing image)
- Hover over the image you want to delete
- Click the trash icon
- Confirm
Warning: Deleting an image used elsewhere on your site will break those pages. Check first.
Cloud vs Local Media
| Aspect | Local | Cloud |
|---|---|---|
| Where files are stored | Your computer | GitHub repo |
| Where images are served | localhost:8000/img/ | your-site.com/img/ |
| Upload speed | Instant | 30–90 seconds |
| Version control | None | Full Git history |
Everything else — the CMS interface, upload flow, file paths — is identical.
Troubleshooting
Image does not appear after upload
- Check your GitHub repo — the file should be in
static/img/ - Check the host's build log — the build should have succeeded
- Refresh with
Ctrl + Shift + R - Wait 30–90 seconds and try again
Upload fails with an error
- Check that you are logged into the CMS correctly
- Check that the file is under 10 MB
- Check your network connection
- Check the host's build log for errors
Image appears broken on the live site
The image path in your content must match a file inside static/img/. Check for typos in the filename.
Image is too large / slow to load
Convert to WebP or AVIF using a free tool like Squoosh. Aim for under 200 KB per image.
Changes save but image is missing on GitHub
The Git Gateway is not working. See Cloud — CMS Access.
What's Next?
You know how to upload and use media in the cloud. Let's learn how automatic rebuilds work.