Contact Page — Content Reference
CMS Path: Pages → Contact Page
File: content/contact.md
The Contact Page contains a configurable form. You can change the form action, add or remove fields, and edit all text.
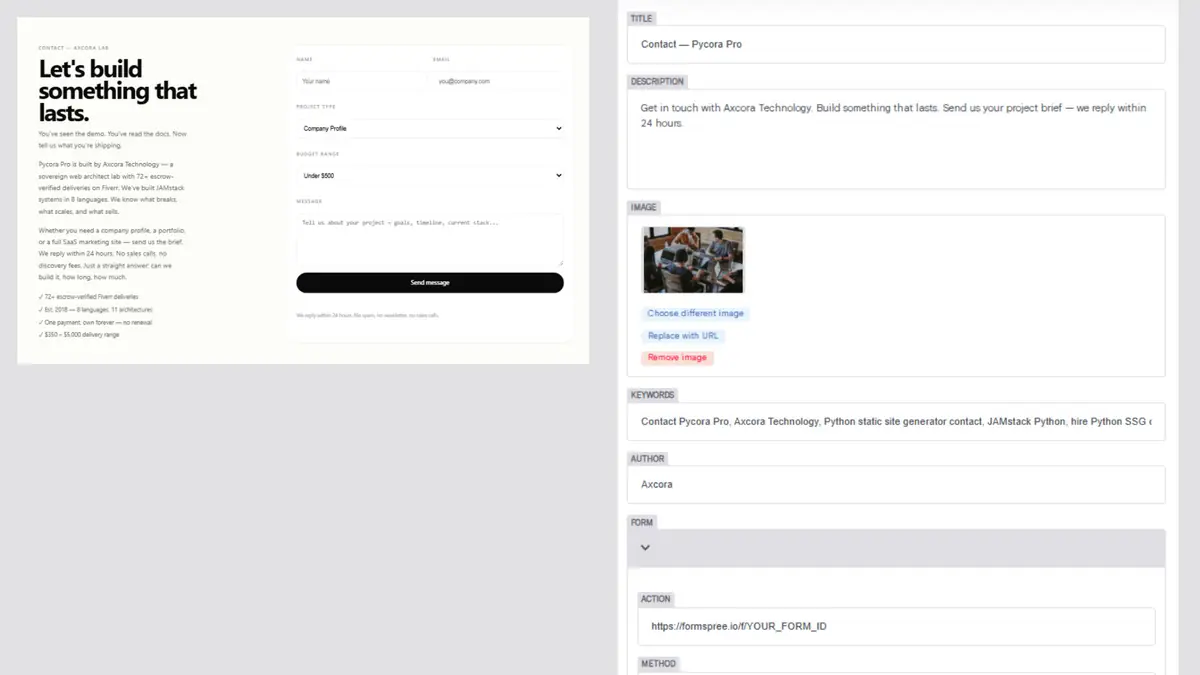
Page Metadata
| Field | File Key | What It Controls |
|---|---|---|
| Layout | layout | Template used (do not change) |
| Title | title | Browser tab and SEO title |
| Description | description | Meta description |
| Image | image | Social share image |
| Keywords | keywords | SEO keywords |
| Author | author | Page author |
Form
| Field | File Key | What It Controls |
|---|---|---|
| Action | form.action | Where the form submits (e.g., Formspree endpoint) |
| Method | form.method | HTTP method (usually POST) |
| Button | form.button | Submit button label |
Note: By default, the form uses Formspree. Replace the
actionURL with your own Formspree endpoint, or another form service such as Basin, Getform, or Web3Forms.
Head
| Field | File Key | What It Controls |
|---|---|---|
| Kicker | head.kicker | Small label above the heading |
| Title | head.title | Main heading (HTML allowed, e.g., <br>) |
| Text | head.text | Description paragraph |
Fields
The Fields list defines the form inputs. Each field has:
| Field | File Key | What It Controls |
|---|---|---|
| Name | fields[].name | HTML name attribute (used when submitting) |
| Label | fields[].label | Visible field label |
| Type | fields[].type | text, email, select, or textarea |
| Placeholder | fields[].placeholder | Grey text inside the input |
| Required | fields[].required | Whether the field is required |
| Half | fields[].half | Whether the field takes half width (2 per row) |
| Rows | fields[].rows | For textarea — number of visible rows |
| Options | fields[].options | For select — list of options |
Default Fields
Pycora Pro ships with these fields:
| Name | Label | Type | Required |
|---|---|---|---|
name | Name | text | Yes |
email | Yes | ||
type | Project type | select | No |
budget | Budget range | select | No |
message | Message | textarea | Yes |
How to Add a Field
- Expand Fields
- Click Add Fields
- Fill in Name, Label, Type
- Add placeholder, required, half, and options as needed
- Click Save
How to Remove a Field
- Expand Fields
- Click the trash icon next to the field
- Click Save
Note
| Field | File Key | What It Controls |
|---|---|---|
| Note | note | Small note below the form |
Example: "We reply within 24 hours. No spam."
Trust
| Field | File Key | What It Controls |
|---|---|---|
| Trust | trust | List of trust badges below the form |
How to add a trust badge:
- Expand Trust
- Click Add Trust
- Enter the text
- Click Save
Example trust badges:
- "72+ verified deliveries"
- "Est. 2018"
- "Replies within 24 hours"
How to Edit the Contact Page
- Open the CMS at
/admin/ - Click Pages → Contact Page
- Edit the metadata
- Expand Form to change the form action
- Expand Fields to add or remove form fields
- Edit Head, Note, and Trust
- Click Save
Form Service Options
| Service | Free Tier | Notes |
|---|---|---|
| Formspree | 50 submissions/month | Easy setup |
| Basin | 100 submissions/month | Clean UI |
| Getform | 50 submissions/month | Good for teams |
| Web3Forms | Unlimited | Requires API key |
After creating an account, copy your endpoint URL and paste it into the Action field.
Best Practices
- Keep the form short — 4–5 fields maximum
- Mark only important fields as required — fewer required = higher completion
- Use clear labels — avoid jargon
- Test the form — submit a test message and confirm it arrives
- Add a note — set expectations (e.g., response time)
Troubleshooting
Form does not submit
- Check the Action URL is correct
- Check the Method is
POST - Check the form service dashboard for errors
- Try a different browser
Submissions go to spam
- Set up SPF and DKIM records for your domain
- Use a reputable form service
- Add a CAPTCHA if needed
Field does not appear
- Confirm the field has Name and Label
- Check that the type is valid (
text,email,select,textarea) - Save again
Select options are empty
Open the field and add at least one Option.
Form styling looks broken
Check that the theme CSS is loading. Refresh with Ctrl + Shift + R.
Related
What's Next?
Now let's look at the Journal Page.